24-hour hotline:+8613662168047
Keyword search: battery plant , lithium battery factory , power bank works , lifepo4 battery mill , Pallet Trucks LiFePO4 Battery, LiFePO4 Pallet Trucks Battery, Lithium Pallet Trucks Battery,
Taking the manufacturing process of valve regulated sealed lead-acid batteries (VRLA) as an example:
The production process is as follows:
Alloy Configuration -->Grid Manufacturing -->Mechanical Coating -->Plate Curing and Drying -->Plate Formation -->Plate Washing and Drying -->Plate Splitting and Cleaning -->Pack Assembly -->Welding of Pole Groups -->Pole Group Insertion -->Battery Short Circuit Test -->Pole Group Welding Series -->Sealing -->High Temperature Solidification -->Terminal Welding -->Terminal Sealing -->High Temperature Curing -->Battery Air Tightness Test -->Quantitative Acid Addition -->Charging -->Ultrasonic Sealing -->Battery Internal Resistance Test -->Battery Acid Sealing -->Battery OCV Testing -->Internal Reliability Testing of Batteries -->Production Date Imprinting -->Battery Trademark Screen Printing -->Packaging -->Storage -->OQC Testing -->Outbound
With the rapid development of electric vehicles and automobiles, as well as the rapid development of power sources in vehicles, there are many problems in the production of batteries, resulting in uneven quality of battery products in the market. The later cycle life of battery capacity cannot reach the designed service life, which is closely related to the unique production process of batteries in production. The structure of a battery consists of components such as an outer shell, upper cover, electrode plate, partition, busbar, pole, bridge protection plate, terminals, etc.
Polar plate weighing
Firstly, the internal plates of each battery need to be weighed and matched. The capacity of each cluster must be equal, otherwise the group with small capacity will be fully charged in advance due to its small capacity, while the group with large capacity will not be fully charged yet. The terminal voltage of the battery is low, and the total voltage will continue to charge until it reaches the termination voltage, causing the group with small capacity to form overcharge. If the group with small capacity loses its charge in advance when the battery is discharged, and the terminal voltage of other batteries is high, the total voltage of the battery does not have the termination protection voltage of electric power assistance. The discharge continues, but it causes the battery to over discharge.
Overcharging and discharging of batteries, as well as untimely charging, can affect the service life of batteries. However, the capacity of the smaller battery group further decreases, and the decrease in battery capacity further leads to overcharging and discharging of the group. This cycle causes the battery capacity to quickly decrease and be scrapped.
2. Treatment of the electrode plate before weighing
Before weighing the electrode plate, it is necessary to remove any excess front edges, burrs, and excess active substances during the application of paste. If not cleaned properly, it may cause a short circuit in the battery electrode plate and result in self discharge of the battery. Use a plate brush to clean the excess impurities on the plate of the earphones for easy soldering, in order to prevent false soldering or false soldering. Select the ones with unevenness, severe powder peeling, and holes on the plates.
3. How to weigh the electrode plate
When weighing and grouping the plates, it is necessary to first weigh a portion of the plates and arrange them on the workbench in order of weight, compare and mark the weight. Then, for the plates that have not been weighed, weigh each plate on the weighing instrument, and place them together with the plates placed on the workbench according to the weight of the plates. This saves some trouble. The smaller the weight difference between each group of positive or negative plates, the better. The error between each group of 10-14AH should not exceed 1g, and the error between each group of 17-20AH should not exceed 2g.
Package partition
1. After weighing, the plates should be grouped according to the regulations. After grouping, the plates should be wrapped. The materials of the partitions are generally microporous rubber and fiberglass. When packaging, attention should be paid to the cleanliness of the partitions. The plates should be placed in the middle of the partitions. If the positions of the plates are aligned, they should be placed in the plate box.
2. Double pack positive plates, use very thin partition plates together to only hold the positive plate, do not pack the negative plate, this can avoid short circuits caused by defects in single partition plates. Single piece packaging board, only the positive electrode board is packaged with a partition board, and the negative electrode board can be placed inside the packaging box, which is convenient and simple.
Selection and Processing of Lead Parts
1. Lead components include lead electrodes and poles, which are cast using specialized molds. Generally around 450 ℃, if the temperature is too high, lead oxidation will be severe, and lead parts will crack due to severe shrinkage. It is not allowed to use iron tools to strike the mold. The lead parts made should be as free of sharp edges as possible, and if there are any, they should be trimmed.
1. Cluster welding, which involves soldering the positive and negative electrodes together with lead to form a cluster, and using oxygen acetylene as a tool to connect the pole and busbar together.
2. Place the packaged electrode plate inside the cluster box, then insert the electrode plate inside the cluster box into the comb plate. Insert the negative electrode first and then the positive electrode, so that the electrode ear is fully inserted into the comb plate. If there are any inadequacies, manually organize them and then place the bars, bridge pillars, and pole pillars between the positive and negative pole ears.
3. Turn on the acetylene and oxygen of the welding gun and ignite it, adjusting it to the appropriate size. Move the welding gun and electrode to the position of the pole ear, then melt the lead bar and pole ear. After the busbar is basically welded, weld the pole post and busbar together. If there are impurities such as lead ash during welding, false welding and false welding will be identified. The welding of the pole and busbar is a key process in the production process, and it is necessary to ensure that the welding is firm and free from false welding and false welding. At this point, impurities need to be removed while welding, and finally the busbar needs to be filled.
After welding the busbar, check for any defects before entering the slot installation process. Generally, the cluster with terminals should be installed first, and then other clusters should be installed. The positive and negative poles should be arranged in series with+-,+-,+-,+-, and+-, and do not install the wrong polarity.
When installing the slot on the electrode plate, it is necessary to install it to the bottom, and then check if the bridge column is normal. If there is any displacement, handle it manually. After trial installation, check if the upper cover can cover the basic cluster lower slot.
5. How to check the pole group? First, let's use a multimeter to measure whether the battery has a short circuit. If the voltage measured is zero or close to zero, it indicates a short circuit in the battery. Check the cluster and find the location of the short circuit for repair. Check if the positive and negative terminals of the multimeter are connected properly without a short circuit, and if there is no negative voltage displayed. If there is, prove that the polarity is reversed, and then reinstall it into the battery compartment.
6. After the detection of the electrode plate, there was no fault and it entered the bridge welding process. The welding of the electrode group is a crucial step. Use bridge welding to clamp the column, and use oxygen welding to weld the bridge column. During welding, ensure that the flame does not burn onto the battery casing, and ensure that there is no false welding, false welding, pole detachment from the cluster, and the cover can be closed smoothly. Seal the battery cover with a 2:1 ratio of epoxy resin adhesive and curing agent. The prepared glue should be used in a timely manner to avoid prolonged solidification. The solidification of the colloid is closely related to temperature, and the higher the temperature, the faster it solidifies. Therefore, it is important to use it as soon as possible. Another thing is to cover the heating equipment.
7. After the battery cover is completed, pole welding should be carried out to check whether the led out pole is in the middle position of the lead out hole. If it is not, it should be corrected. Insert the pole mold onto the outgoing pole and melt the pole with oxygen welding. There is another type of welding, which involves placing the terminal on the outgoing pole, placing it in the correct position, melting the solder wire with a soldering iron, and soldering the terminal and pole together. Pay attention to false welding and false welding during welding.
Electrolyte configuration
The electrolyte of lead-acid batteries is prepared with pure water and concentrated sulfuric acid. The density of electrolyte for automotive starter batteries is
1.280 ± 0.005g/cm3 (at 25 ℃)
② The container for preparing electrolyte must be acid and temperature resistant glazed ceramic, glass cylinder, plastic tank or lead lined wooden tank. When preparing, the staff must wear protective equipment;
Wash the utensils thoroughly before preparation and rinse with pure water;
When preparing the electrolyte, the required pure water should be first placed in a container, and then concentrated sulfuric acid should be slowly injected into the pure water while stirring continuously. It is strictly prohibited to inject water into sulfuric acid to avoid splashing and burning
The conversion formula is d25=dt+0.0007 (t-25)
D25: 25 ℃ electrolyte concentration dt: electrolyte concentration at temperature t
0.0007: Temperature coefficient t: measured electrolyte concentration
The main components of the electrolyte are distilled water and sulfuric acid. When preparing, the container must be acid resistant and clean.
2. Staff should have safety awareness and wear acid resistant gloves and clothing while working. If sulfuric acid splashes onto the skin during operation, it should be washed repeatedly with clean water in a timely manner. When configuring, first pour distilled water into a clean container, then slowly introduce concentrated sulfuric acid and stir with acid resistant tools. If the temperature is too high, stop adding acid to prevent the acidity from splashing out. Mix it to 1.1:28 at a temperature of 25 ℃. It is strictly prohibited to pour water into acid during configuration.
3. The amount of acid added can only be calculated based on the capacity of the battery and the capacity of the battery casing, the acid density, and the matching loss during charging and discharging, as acid is no longer pumped out after charging and discharging.
Inject electrolyte
Unscrew the exhaust plug and make sure to penetrate the ventilation hole on the plug. There is a sealing gasket and paper under the plug, which needs to be removed after acid injection;
The electrolyte temperature must be cooled to below 30 ℃ and filled into the battery;
Inject the prepared electrolyte into each cell, and the liquid level of the plastic shell battery should be level with the mark "max" on the outer shell. The liquid level of the rubber tank battery should be 10-15mm higher than the partition;
Tighten the exhaust plug to prevent acid leakage

Lithium Batteries ,Ensure Quality
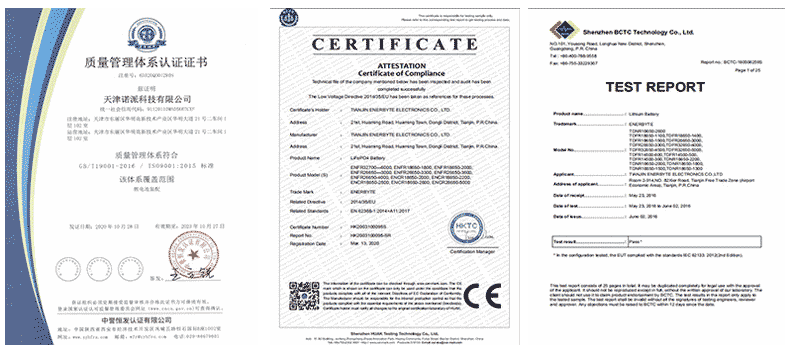
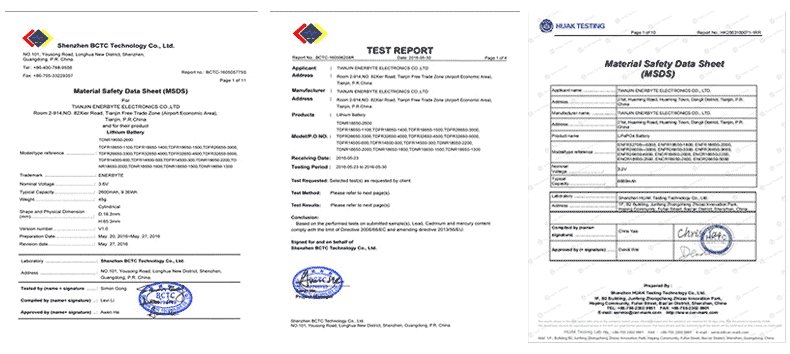
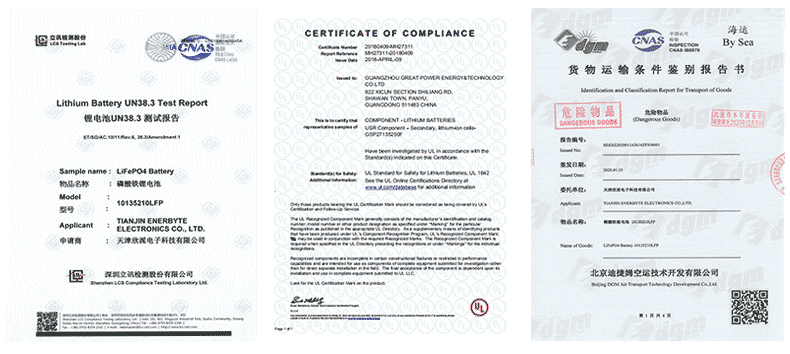
Our lithium battery production line has a complete and scientific quality management system
Ensure the product quality of lithium batteries
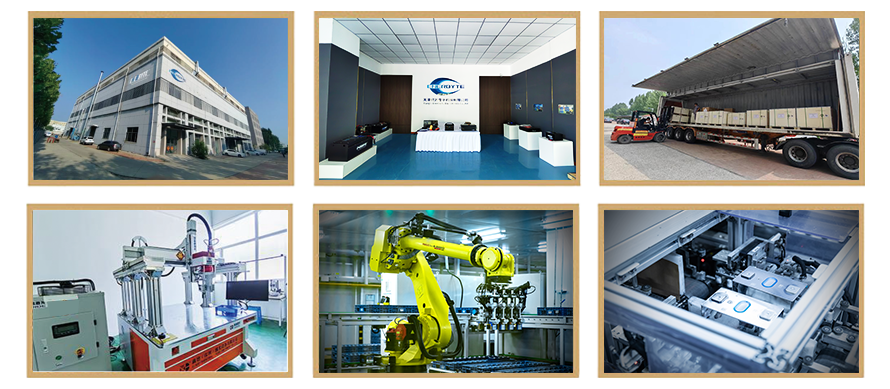
Years of experience in producing lithium batteries
Focus on the production of lithium batteries
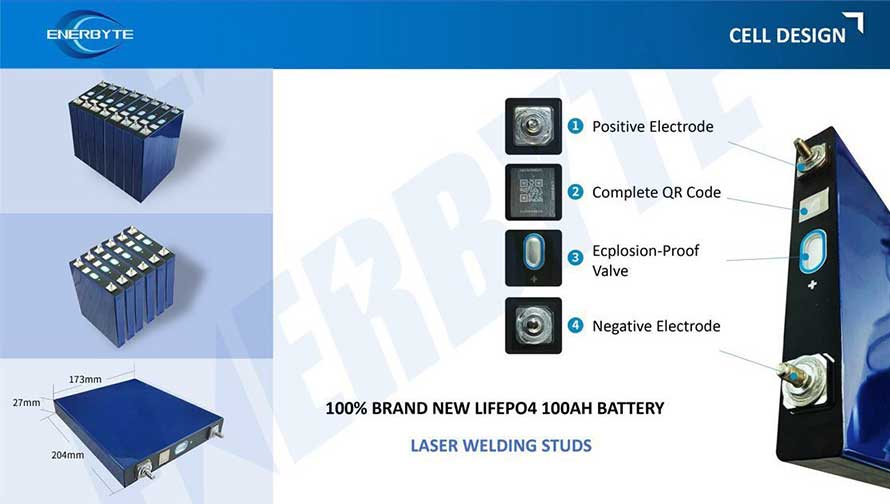
WE PROMISE TO MAKE EVERY LITHIUM BATTERY WELL
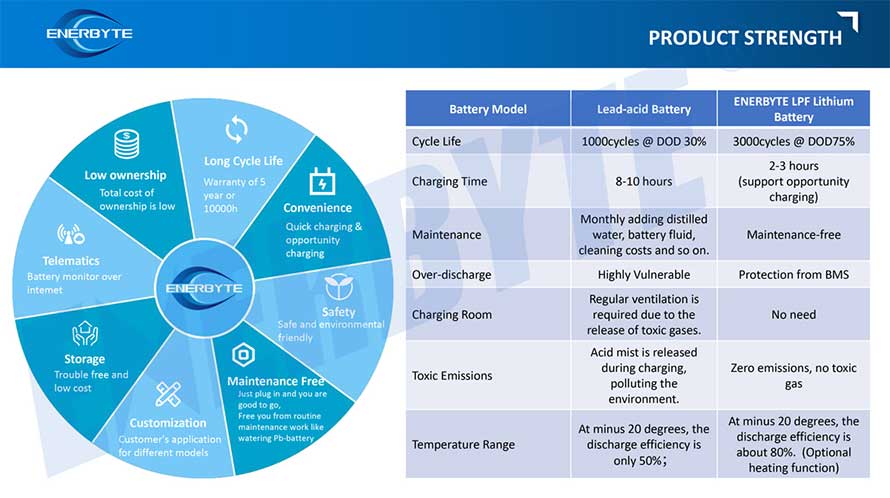
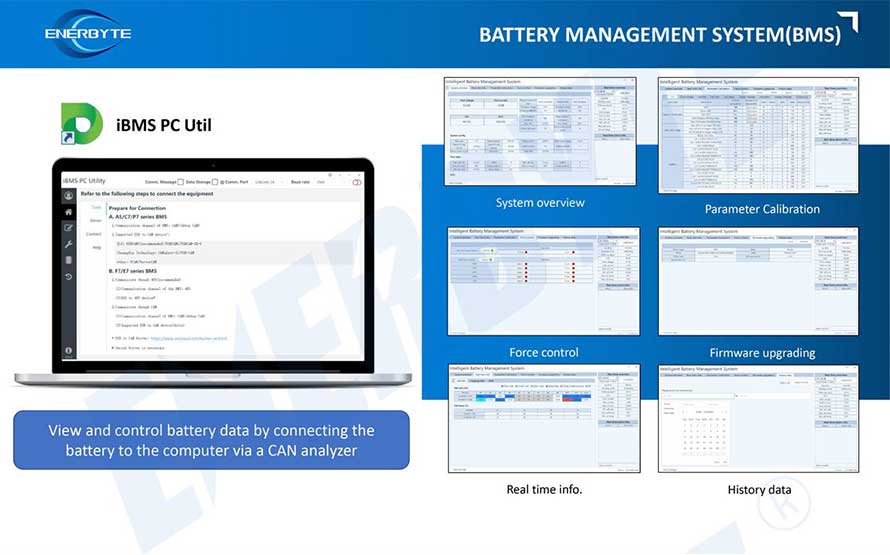
We have a comprehensive explanation of lithium batteries
QUALIFICATION CERTIFICATE
THE QUALITY OF COMPLIANCE PROVIDES GUARANTEE FOR CUSTOMERS
MULTIPLE QUALIFICATION CERTIFICATES TO ENSURE STABLE PRODUCT QUALITY
Providing customers with professional and assured products is the guarantee of our continuous progress.

Applicable brands of our products


 Service hotline